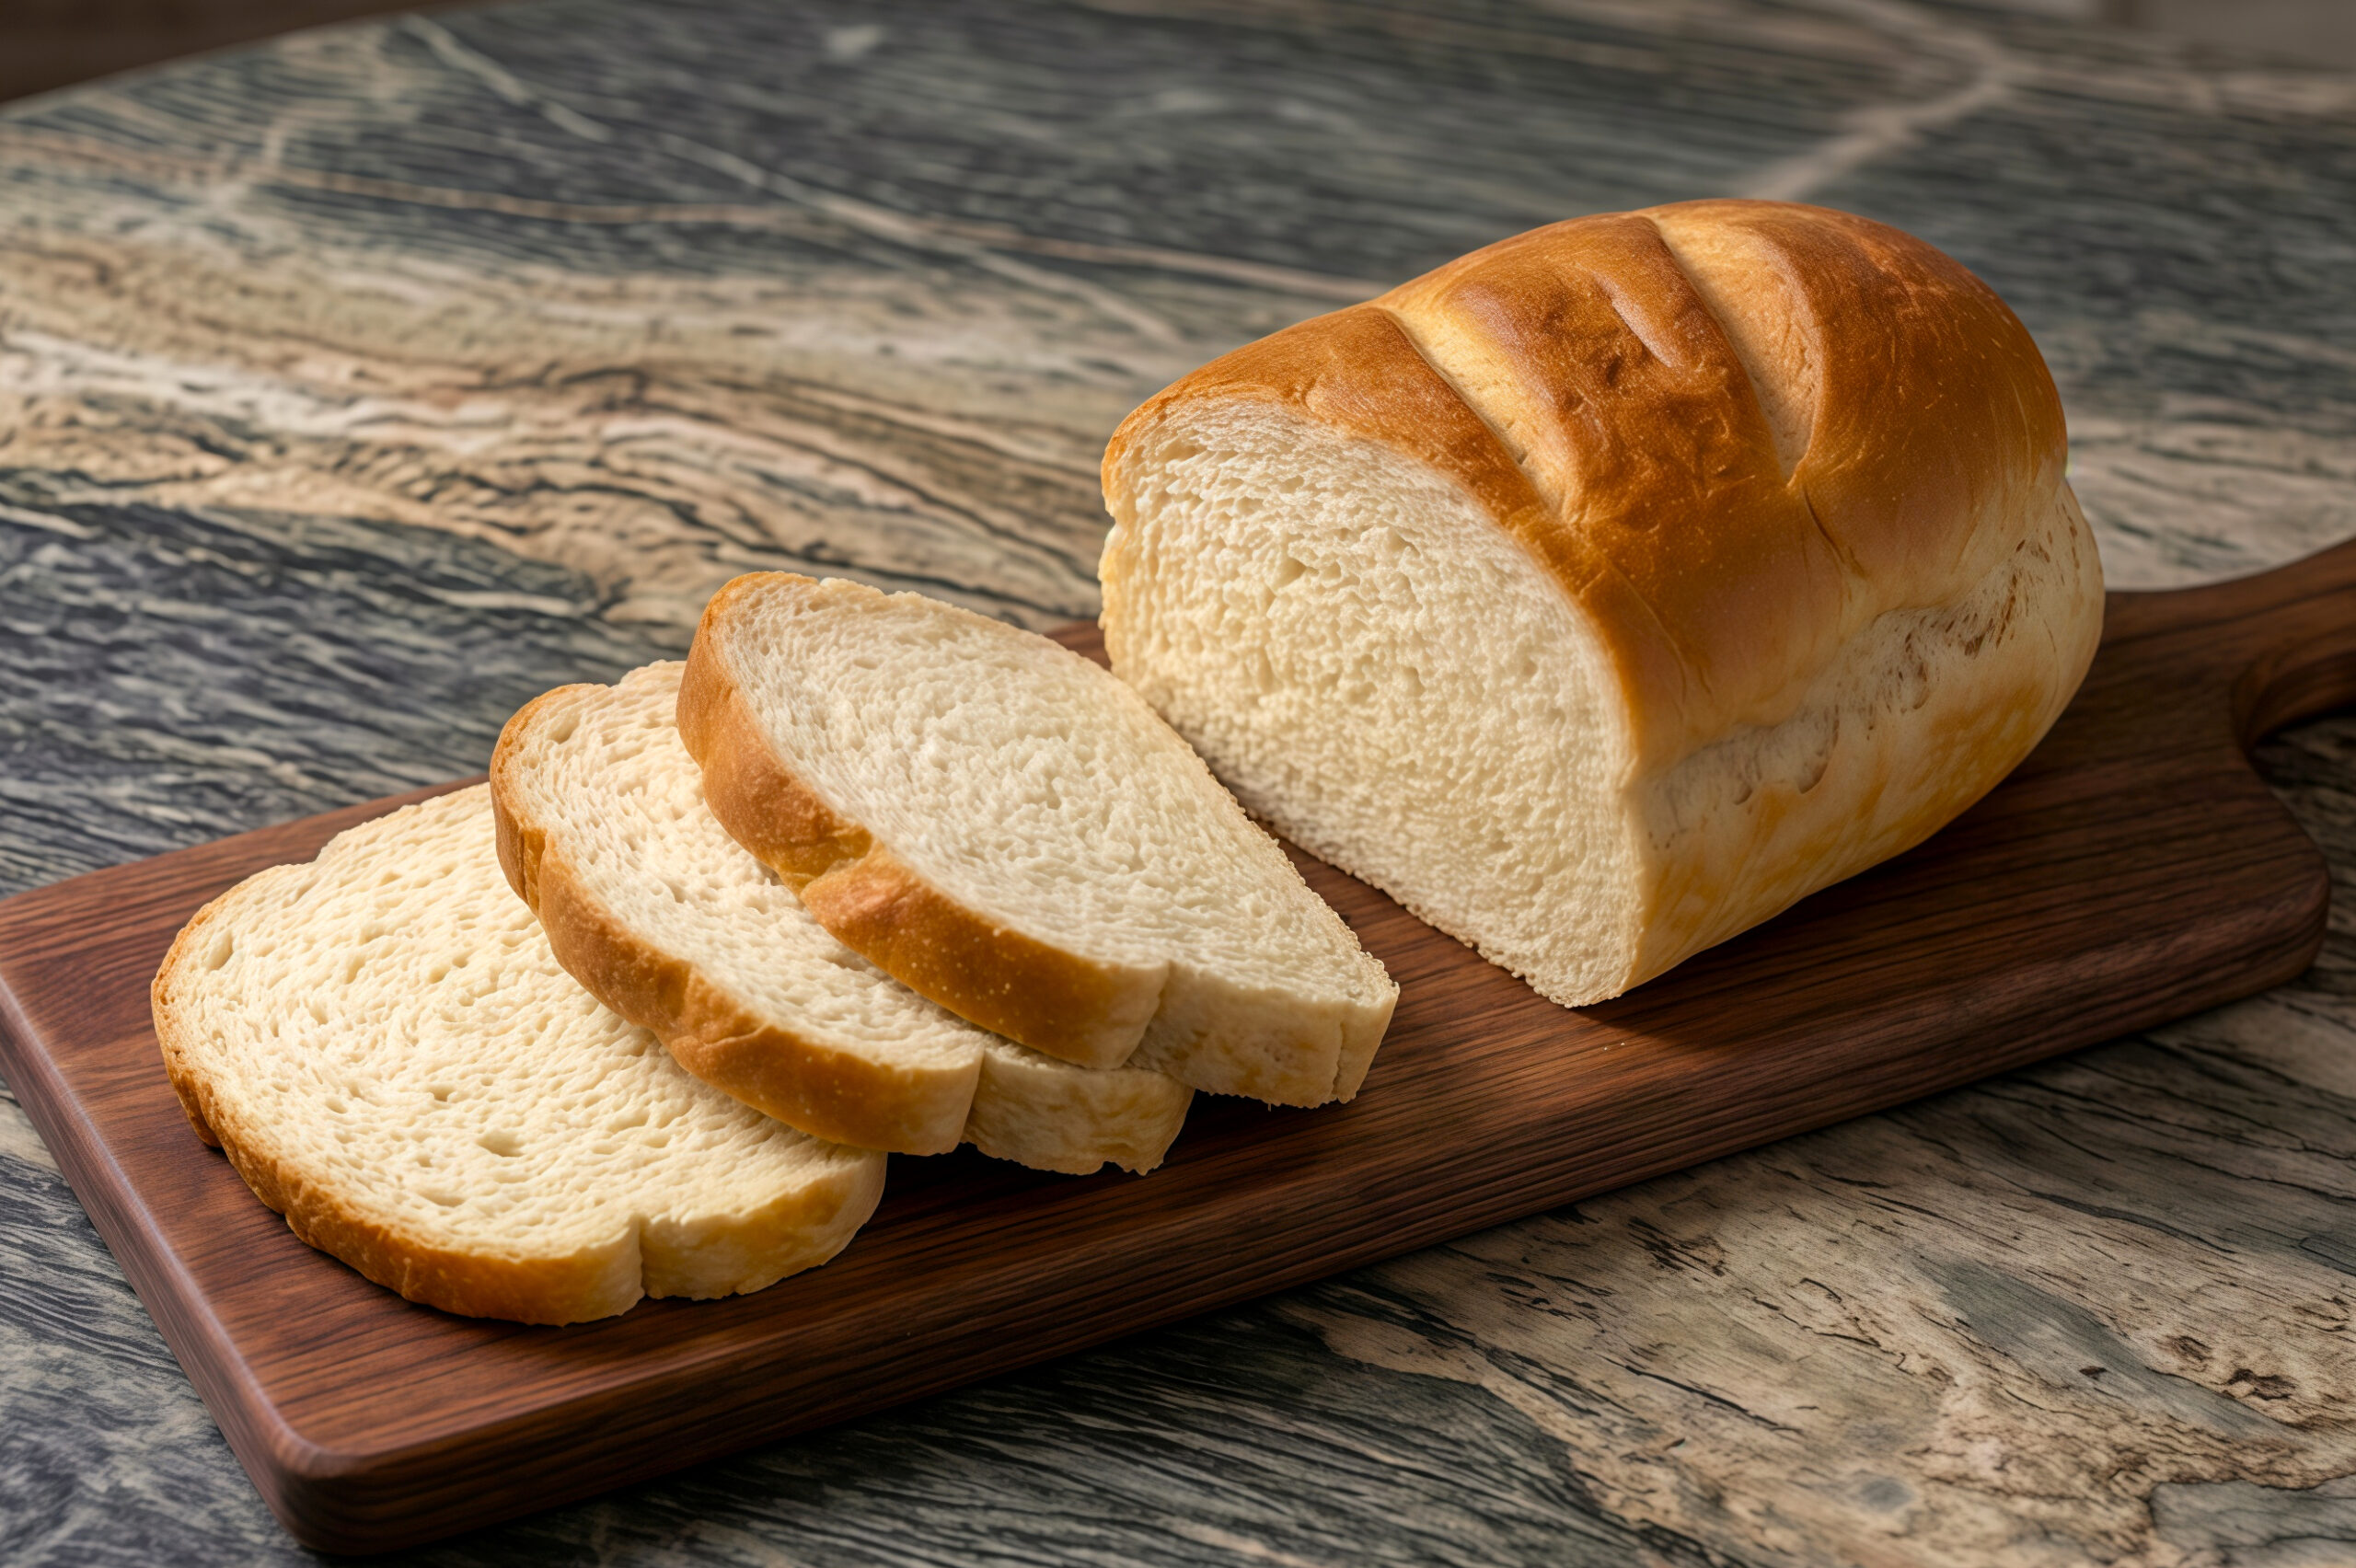
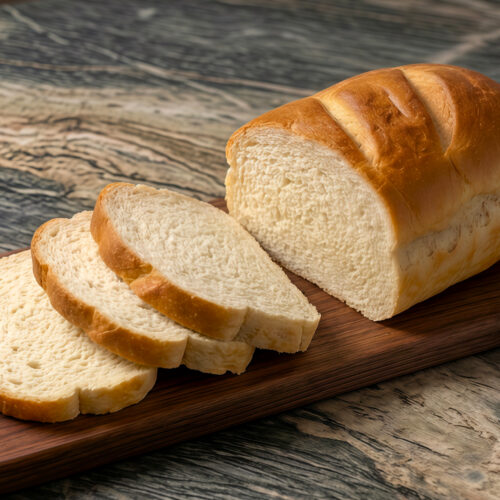
If you have never baked bread at home, this simple recipe is the perfect place to start. With just flour, water, yeast, oil and a bit of patience, you get a soft, fluffy loaf that fills the kitchen with the smell of fresh bread. The dough is easy to work with, and the steps are clear and beginner-friendly, so you can enjoy homemade bread any day of the week.
What ingredients do we need for fluffy homemade bread
To bake a fluffy homemade bread loaf you only need a few pantry staples that you probably already have at home. The base of the dough is all-purpose flour, which gives the bread a soft crumb that is perfect for everyday sandwiches and toast. Warm water helps activate the yeast and brings the dough together without making it heavy. A small amount of fine salt is essential for flavor, otherwise the bread will taste flat and bland even if the texture is good. Active dry yeast is the ingredient that makes the dough rise and become airy; with just one packet you can get a nicely domed loaf. A couple of tablespoons of sunflower oil add tenderness and help keep the crumb soft for longer, while an egg brushed on top before baking gives the bread a beautiful golden crust and an appetizing shine.
How to activate yeast correctly for this bread
Correctly activating the yeast is a key step for getting a bread that rises well and has an airy, even crumb. For this recipe we use warm water, not hot and not cold, so that the yeast wakes up gently and starts to feed. Start by pouring the warm water into a bowl and dissolving the salt, then sprinkle the yeast over the surface. Let it sit for a short moment so the granules hydrate, then stir to distribute it evenly in the liquid. If your kitchen is very cold, you can leave this mixture for a few extra minutes until you see slight foaming, a sign that the yeast is active and ready to work in the dough. Using fresh, in-date yeast is very important; old yeast may not rise properly and can ruin the texture of the bread. Once activated, you can safely add the oil and start incorporating the flour without fear that the yeast has been shocked or killed.
Kneading the dough for a soft, elastic crumb
Kneading is what transforms a simple mixture of flour and water into a smooth, elastic dough that can trap gas and rise beautifully in the oven. After you gradually add the flour to the liquid ingredients, you will notice the mixture going from sticky to more cohesive. At this stage, start kneading with the heel of your hand, pushing the dough away from you and then folding it back over itself. Continue this rhythm for about five minutes; the dough should become less sticky and more elastic. If it sticks a lot, sprinkle just a little flour on the work surface, but avoid adding too much or the bread will become dense. Proper kneading develops the gluten network, which is responsible for the soft, stretchy texture of the crumb. You will know the dough is ready when it feels smooth, slightly bouncy and no longer tears easily when stretched.
First rise: how to let the dough proof properly
The first rise, or bulk fermentation, is where the magic really happens and the dough develops both structure and flavor. Once you have a smooth ball of dough, place it into a clean, dry bowl dusted with a bit of flour to prevent sticking. Cover the bowl with a kitchen towel to protect the dough from drafts and let it rest in a warm spot for about an hour. During this time, the yeast feeds on the flour and produces gas, which inflates the dough. You will see it almost double in volume and feel much lighter when you gently press it. If your kitchen is cooler, the rise may take a bit longer, so rely more on how the dough looks than on the exact timing. A well-risen dough will have a slightly domed surface and feel puffy, not tight or heavy. Do not rush this step; giving the dough enough time to rise is essential for a fluffy, well-textured loaf.
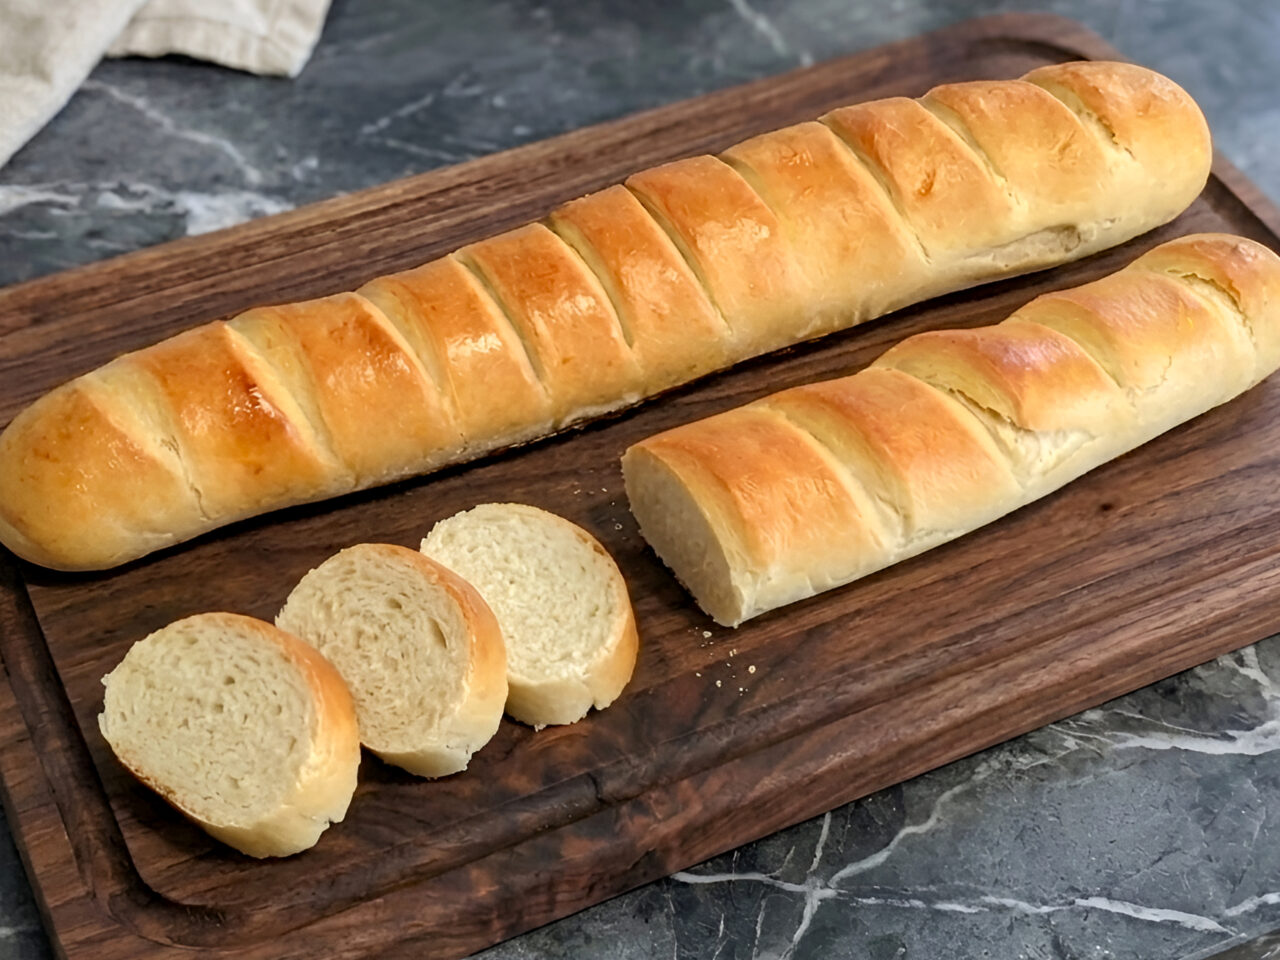
Shaping the loaf: toast-style, braided or round
After the first rise, the dough is full of air and ready to be shaped into the loaf you like best. Gently transfer it onto a lightly floured work surface, then knead it briefly to redistribute the gas and smooth out the texture. From here, you can choose your preferred shape. For a classic sandwich loaf, flatten the dough into a rough rectangle, roll it up tightly from the short side and pinch the seam closed before placing it into a loaf pan. If you prefer a braided loaf, divide the dough into equal strands, roll them into ropes and braid them carefully for a decorative look. For a rustic round loaf, simply tuck the edges of the dough under itself to create tension on the surface and form a ball. The shape you choose will influence how the bread looks, but the crumb will stay soft and fluffy as long as the dough has been kneaded and proofed correctly.
The second rise and why it matters
The second rise, also known as proofing in the pan, is the step that ensures your shaped loaf bakes up tall and light instead of flat and dense. Once the dough is shaped and placed in the lined pan or on a tray, cover it again with a kitchen towel and let it rest for about 20 minutes. During this time, the yeast continues to work, but more gently than during the first rise, giving the loaf its final volume and structure. You will notice the dough puff up and fill the pan more fully, with a smooth, slightly domed top. Skipping or shortening this rise can result in a loaf that cracks oddly or feels heavy. On the other hand, overproofing can cause the dough to collapse when it goes into the oven. Aim for a dough that looks nicely expanded but still has a bit of spring when you touch it lightly with your fingertip.
Scoring and baking for a golden crust
Just before baking, there are two important steps that help you achieve a professional-looking loaf with a crisp, golden crust. First, beat the egg and brush it evenly over the surface of the risen dough. This simple step gives the baked bread a beautiful color and gentle shine that makes it look very appetizing. Next, use a sharp knife or bread lame to make a few cuts on top of the loaf. These scores act like controlled vents, allowing steam and gases to escape as the bread rises in the oven so it does not crack randomly. Place the loaf into a properly preheated oven and bake it at a higher temperature for the first part of the time, then lower the heat so the inside can cook through without burning the crust. When the bread is done, it should be deeply golden and sound hollow when tapped on the bottom.
Cooling, slicing and storing your homemade bread
Even though it is tempting to cut into the bread as soon as it comes out of the oven, allowing it to cool is an important part of the process. When you remove the loaf from the pan and place it on a wire rack, the steam inside continues to escape and the crumb sets. If you slice too early, the interior can become gummy and lose its fluffy structure. Once the bread has cooled to room temperature, you can slice it with a sharp serrated knife to reveal the soft, airy crumb. Store the bread wrapped in a clean kitchen towel or in a bread box to keep the crust pleasant while preventing it from drying out too quickly. This homemade loaf stays soft for a couple of days and is perfect for toast, sandwiches or to serve alongside soups and stews. You can also slice and freeze it if you want to keep it for longer.
Fluffy Homemade White Bread
Ingredients
- 4¼ cups all-purpose flour
- 1⅔ cups warm water
- 1 teaspoon fine salt
- 2¼ teaspoons active dry yeast
- 2 tablespoons sunflower oil
For brushing:
- 1 large egg
Instructions
- Pour the warm water into a large bowl and add the salt. Mix briefly to dissolve the salt.
- Sprinkle in the dry yeast. Let it sit for a minute, then stir to combine.
- Add the sunflower oil and mix it into the liquid.
- Start adding the flour gradually, mixing as you go so it hydrates evenly.
- Knead the dough for about 5 minutes, until it becomes smooth and slightly elastic.
- Shape the dough into a ball, transfer it to a clean, dry bowl lightly dusted with flour. Cover the bowl with a kitchen towel and let the dough rise in a warm place for 1 hour.
- The dough has now risen and increased in volume.
- Transfer the dough onto a lightly floured work surface and knead it briefly. Shape it into the type of loaf you prefer.
- Place the shaped loaf into a baking pan lined with parchment paper and cover it with a kitchen towel. Let it rise again for 20 minutes.
- The bread has risen and puffed up in the pan.
- Beat the egg and brush it over the surface of the bread using a pastry brush.
- Score the top of the loaf with a sharp knife so it can open nicely in the oven and avoid random cracks.
- Preheat the oven. Bake the bread for 20 minutes at 410°F (210°C), then reduce the temperature to 355°F (180°C) and bake for another 20 minutes, until deeply golden.
- Let the bread cool completely, then slice and serve.
Frequently Asked Questions
Yes, you can use bread flour for this recipe. The loaf will have a slightly chewier texture and may rise a bit higher because bread flour has more protein and develops stronger gluten.
You can use any neutral-tasting oil, such as canola or vegetable oil. Avoid oils with a strong flavor, like extra virgin olive oil, if you want to keep the taste of the bread mild and versatile.
Check that your yeast is fresh and that the room is warm enough. If the dough rises very slowly, give it more time. If there is almost no movement after an hour, the yeast may be inactive and you will need to start again.
The bread is ready when the crust is a deep golden color and the loaf sounds hollow when you tap the bottom. If you have a thermometer, the internal temperature should be around 200–205°F.