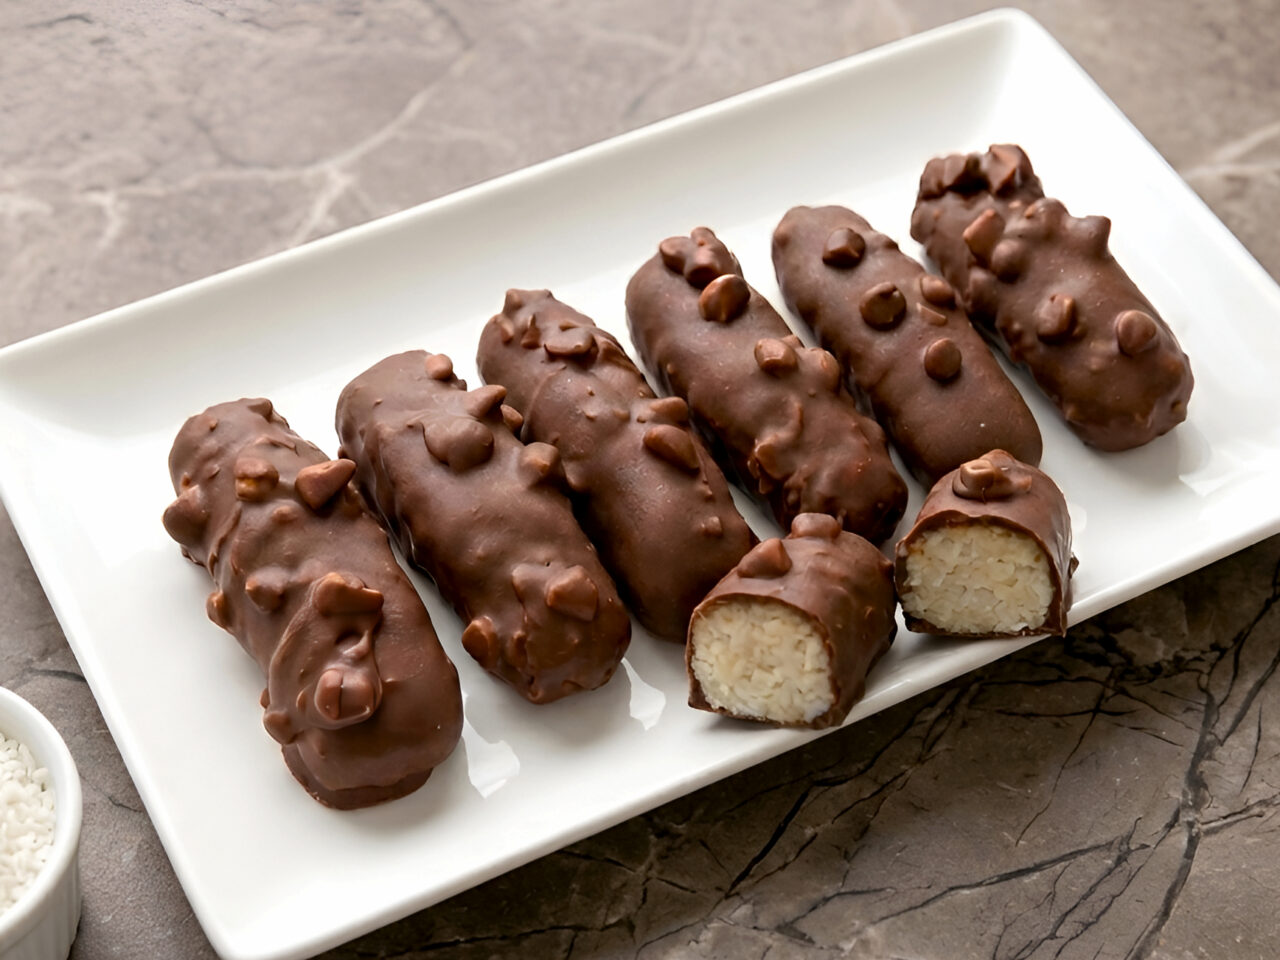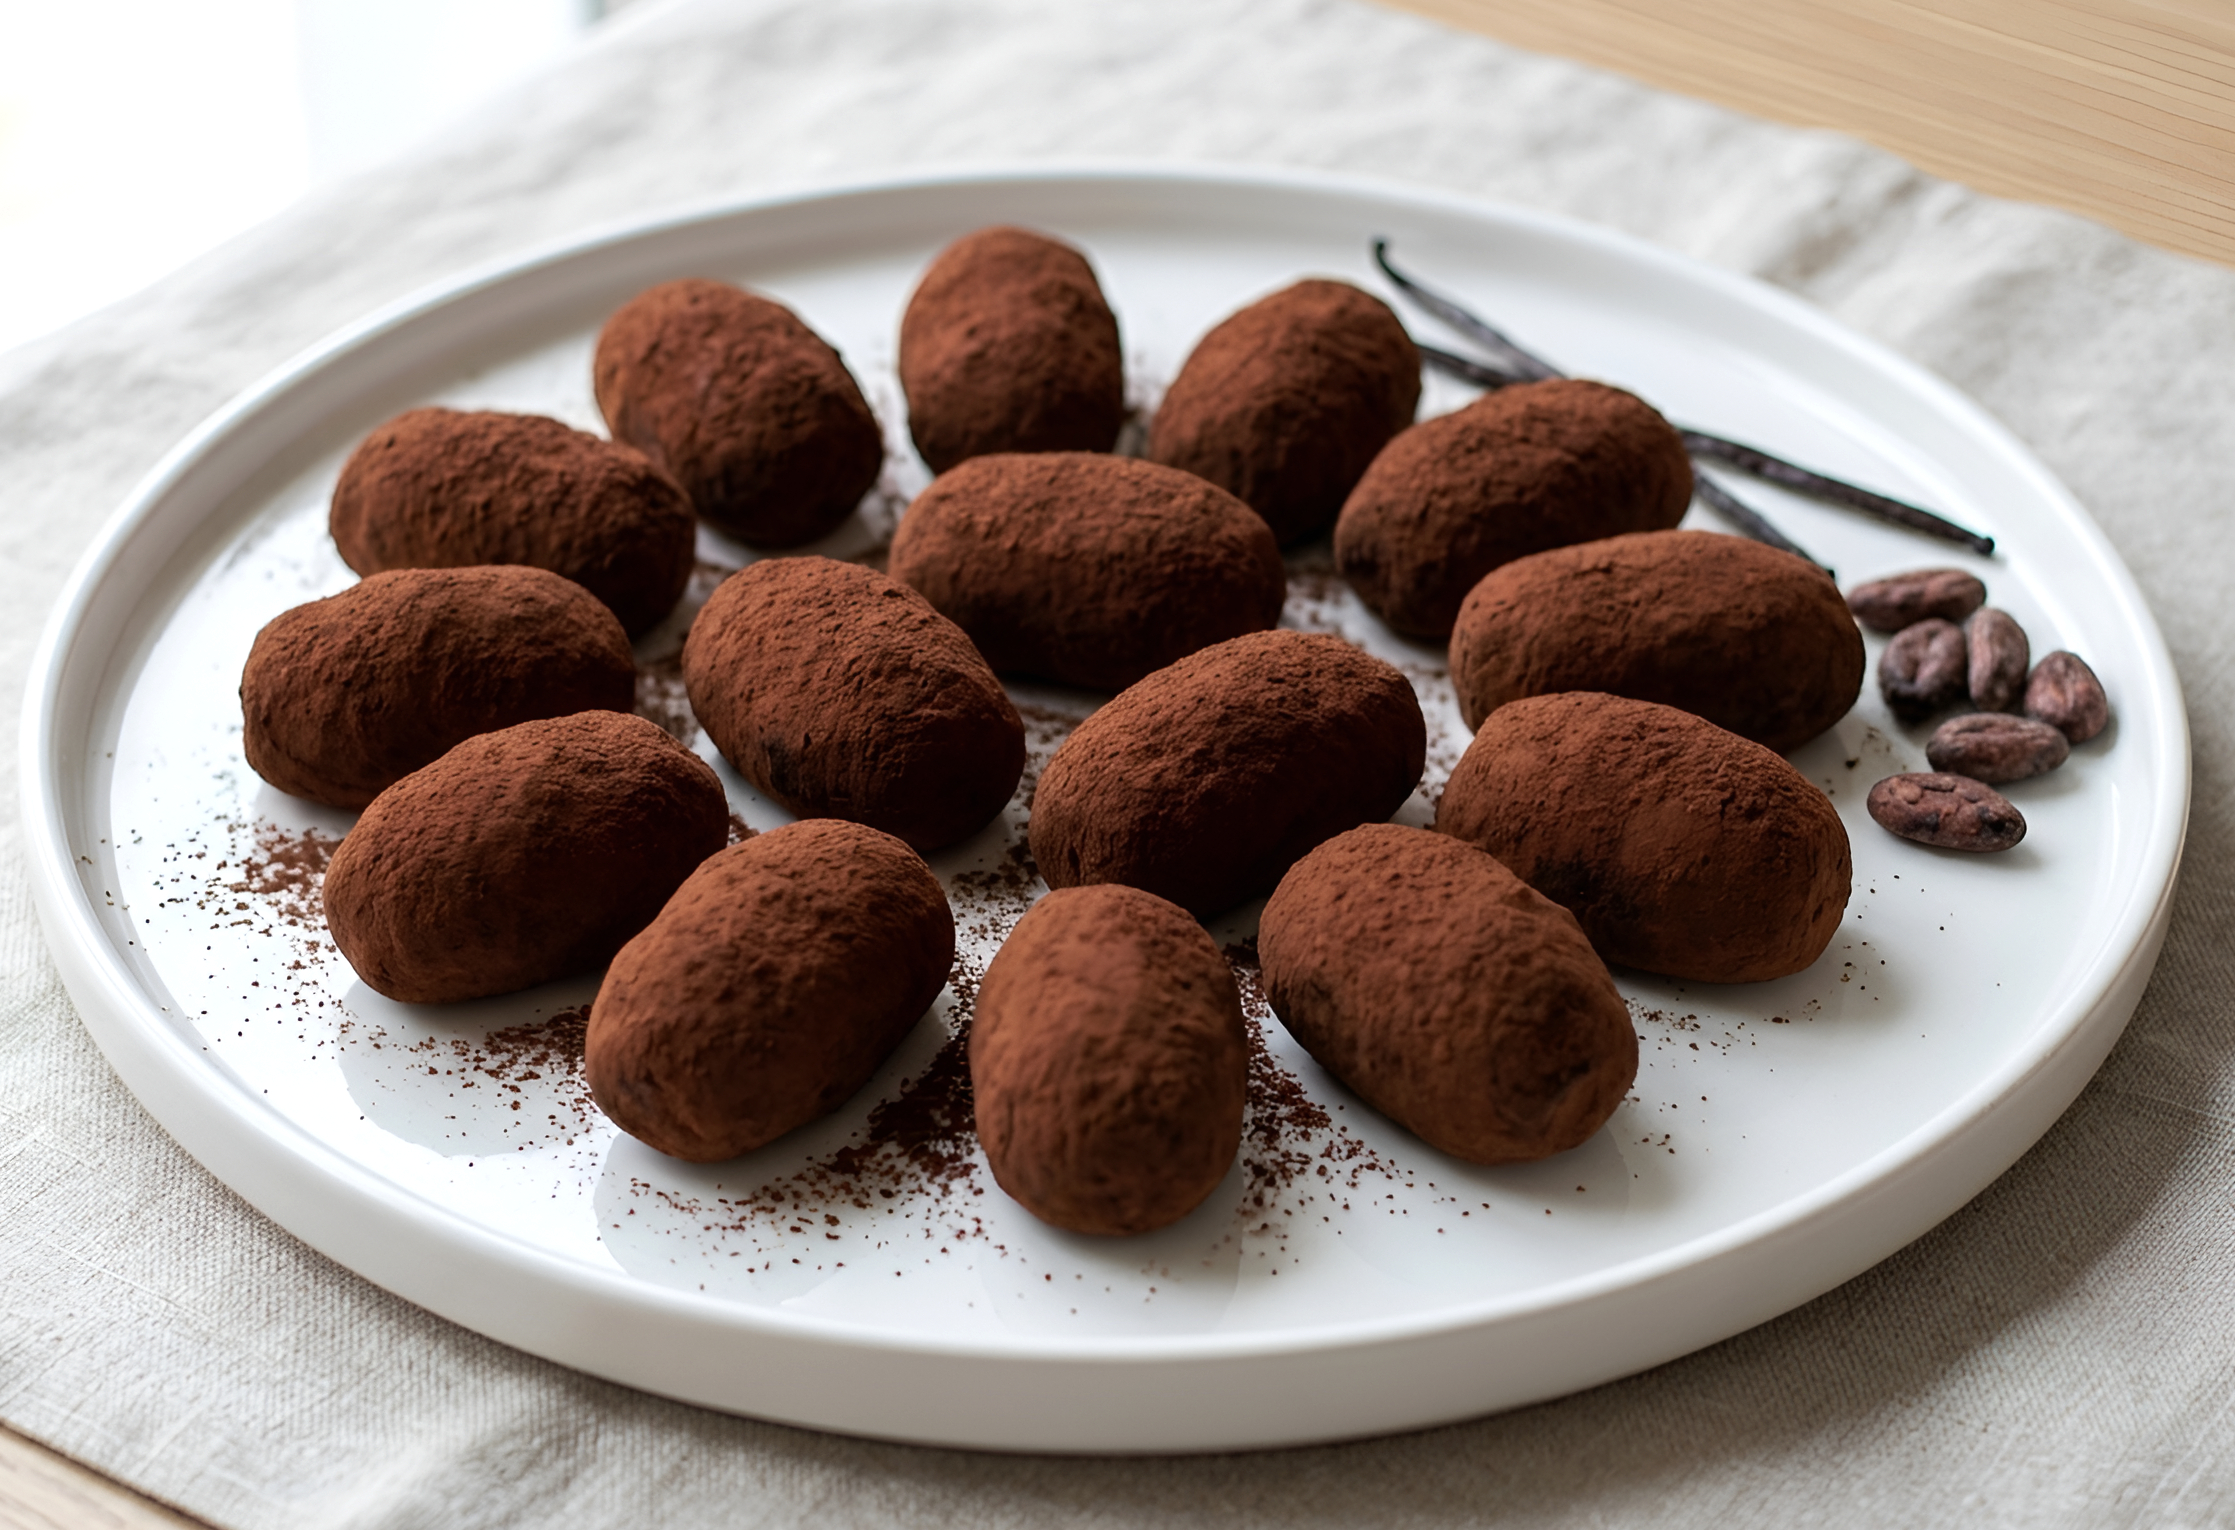
This potato‑style chocolate biscuit dessert is a nostalgic no‑bake treat made from pantry staples: plain biscuits, sweetened condensed milk, butter and cocoa. The biscuits are crushed, mixed with a quick butter and condensed milk cream, then shaped into small “potatoes” and rolled in cocoa. After a short rest in the fridge, they become firm, rich and slightly fudgy. It is the perfect dessert when you crave something sweet, but do not want to turn on the oven.
Why combine butter and condensed milk into a cream
Mixing softened butter with sweetened condensed milk before adding the biscuit crumbs has several advantages. First, it ensures the fat from the butter and the sweetness from the condensed milk are evenly distributed throughout the dessert, so you do not end up with dry spots or overly wet pockets. Using a fork or small whisk is enough to create a simple, smooth cream without taking out a mixer. Because this is a no‑bake recipe, you do not need to incorporate air into the mixture as you would for a cake, so there is no need for heavy whipping. The goal is just to blend until the consistency looks even and slightly glossy. This step also makes it easier to adjust the thickness: if the mixture looks too stiff, you can let the butter soften a bit more; if it seems too loose, the biscuit crumbs will balance it out later. The result is a reliable base that holds the biscuits together and helps the truffles keep their shape after chilling.
How do we mix in the crushed biscuits for a moldable dough
Once the butter and condensed milk cream is ready, it is time to turn it into a thick dough by adding the crushed biscuits. Start by adding the crumbs in two or three additions rather than all at once. This allows you to gauge how quickly the mixture thickens and makes it easier to stir everything evenly with a fork or spatula. As the crumbs absorb the moisture and fat, the mixture will gradually move from creamy to dense and slightly sticky. You are looking for a dough that holds together when pressed in your hand without crumbling apart. If it feels too soft and spreads, mix in a bit more biscuit crumbs if you have them. On the other hand, if it seems too dry and cracks when you squeeze it, you can add a teaspoon or two of additional condensed milk or a small piece of softened butter. When the texture is right, the dough should be easy to pinch and shape into small logs or ovals without falling apart.
How do we shape and coat the “potato” truffles
Shaping the truffles is the most fun part, and it does not require any special skills. First, spread a thin, even layer of unsweetened cocoa powder on a shallow plate. This will be your coating. Take small portions of the biscuit dough, roughly the size of a large walnut, and roll them between your palms to form short logs or oval shapes that resemble tiny potatoes. The surface does not need to be perfectly smooth; a few irregularities make them look more rustic and authentic. Once shaped, gently roll each piece in the cocoa powder until it is coated on all sides. The cocoa not only gives a deeper chocolate taste, but also prevents the truffles from sticking to your fingers or to each other. As you work, arrange the coated “potatoes” on a tray lined with parchment paper, leaving a little space between them so the sides remain neat and the coating stays intact.
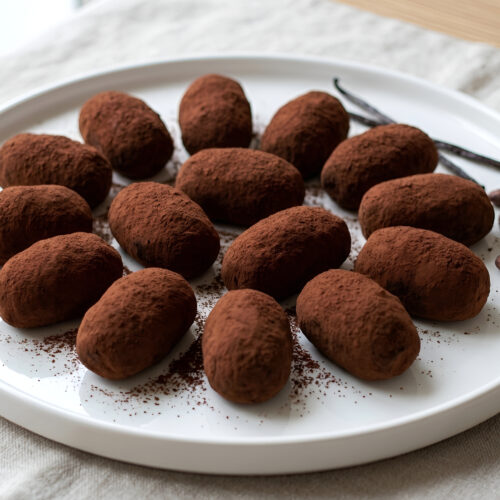
How do we store and serve these biscuit “potatoes”
These potato‑style biscuit truffles are very easy to store, which makes them perfect for making ahead. Once they have chilled and set, transfer them to an airtight container, arranging them in layers with parchment paper between each layer if necessary. Keep the container in the refrigerator, where the truffles will stay fresh for several days. Because they are rich and sweet, one or two pieces are usually enough per serving, especially after a meal. For the best texture, you can let them sit at room temperature for a few minutes before serving so they soften slightly. They pair beautifully with coffee, tea or a glass of milk and work well on dessert platters alongside other no‑bake treats. Avoid leaving them in a warm environment for too long, as the butter can soften and the truffles may lose their firm shape.
Tips and variations for a perfect no‑bake chocolate biscuit dessert
Although this recipe uses just biscuits, butter, condensed milk and cocoa, you can easily adjust it to your taste while keeping the preparation simple. Using good quality cocoa powder will give a deeper chocolate flavor, so it is worth choosing one you really like. If you prefer a less sweet dessert, you can slightly reduce the amount of condensed milk and compensate with a teaspoon or two of milk or cream to keep the dough workable. For a hint of flavor, a small splash of vanilla extract or a drop of rum flavoring can be added to the butter and condensed milk cream. You can also play with texture by using a mix of very fine biscuit crumbs and a few slightly larger pieces for gentle crunch. Just remember not to overload the dough with extras, as the charm of this dessert lies in how quick, straightforward and family‑friendly it is.
Potato‑Style Chocolate Biscuit Truffles with Condensed Milk
Ingredients
- 10.5 oz plain tea biscuits
- 1/2 cups sweetened condensed milk
- 7 tbsp unsalted butter, softened
- 2 tbsp unsweetened cocoa powder plus more for coating
Instructions
- Crush the biscuits in any way that works for you. You can use a large food processor, which makes the job quick and easy, especially if it fits a big batch of biscuits at once. Some people like to use a meat grinder, which is how these were made in many Eastern European homes. You can also put the biscuits in a sturdy bag and crush them well with a rolling pin. In that case, the crumbs will be a bit larger, but this will not affect the taste or enjoyment of the truffles.
- Place the softened butter and sweetened condensed milk in a mixing bowl. Mix them together with a fork until you get a creamy mixture. You can use a mixer if you prefer, but it is not essential for this recipe – the cream can be a bit more or less smooth and it will not change the final result. Plus, using a fork means you have fewer dishes to wash. A small whisk works just as well as a fork.
- Add the biscuit crumbs to the butter and condensed milk mixture. Stir everything together with the same fork until the mixture looks even and well combined. The “dough” will be quite thick and dense, which is exactly what you want so it can be shaped easily.
- Sprinkle some cocoa powder onto a shallow plate. Take portions of the dough and shape them into small, elongated truffles that resemble tiny potatoes. Roll each piece in the cocoa so it is coated on all sides, then place it on a sheet of parchment paper. You can shape them however you like – oval or round both work well.
- Transfer the finished chocolate “potatoes” to the refrigerator and chill for at least 1 hour. The butter needs time to cool and firm up, which will help the truffles set and hold their shape nicely. Serve chilled or at cool room temperature.
Frequently Asked Questions
Plain tea biscuits or simple butter biscuits work best because they have a neutral flavor and crumble easily. Avoid cream‑filled sandwich cookies, which are too sweet and can change the texture of the mixture.
No. Evaporated milk is not sweet and is much thinner than sweetened condensed milk, so it will not bind the biscuit crumbs properly. For the right texture and flavor you need thick, sweetened condensed milk.
They should chill in the refrigerator for at least one hour so the butter can firm up and the mixture can set. For even better texture and cleaner slices, you can leave them to chill for several hours or overnight.