
Smetannik is one of those old‑fashioned sour cream cakes that tastes even better the next day. Thin, slightly crisp layers soak up a rich sour cream filling and become incredibly tender in the fridge. The texture is somewhere between a layered shortbread and a classic sponge, with a gentle tang that keeps every bite from being too sweet. Finished with a simple dark chocolate glaze, this cake looks elegant on any dessert table, yet it is made with very basic ingredients. If you love comforting Eastern European desserts, this Smetannik will quickly become a favorite.

What makes a classic Smetannik sour cream cake special
Smetannik is all about sour cream, both in the layers and in the filling. The dough starts from a mixture of sour cream, eggs, sugar, oil and butter, then is enriched with plenty of flour to create a soft but sturdy base you can roll out thin. Once baked, the layers are slightly crisp, almost cookie‑like. The magic happens when you stack them with a generous amount of whipped sour cream and sugar. As the cake chills, the cream slowly soaks into each layer, turning them tender and moist while still holding their shape. A glossy dark chocolate glaze on top creates contrast in flavor and texture and gives the cake a simple but elegant finish that works for any celebration.
Choosing the right sour cream for Smetannik filling
For an authentic Smetannik, use full‑fat sour cream with at least 20–25% fat, not light or low‑fat versions. High fat content is essential for whipping the cream into a thick, stable filling that will not slide off the cake. To get that rich consistency you see in bakery cakes, the sour cream is first drained in cheesecloth for several hours to remove excess whey. This step concentrates the flavor and gives a texture similar to a cross between Greek yogurt and mascarpone. Once drained, the sour cream whips beautifully with sugar into a luscious cream that spreads easily between the layers. Using thin sour cream will result in a runny filling and a soggy cake, so this detail makes a big difference.
How to mix and knead the dough for perfect layers
The dough for Smetannik should be soft, smooth and easy to roll, without being sticky. Start by activating the baking powder in sour cream – you will see small bubbles forming as the mixture becomes airy. Then add eggs, sugar, oil and melted butter and mix well to form a rich base. When you incorporate the flour, do it gradually, first with a spoon, then by hand, just until the dough comes together. Over‑kneading can make the layers tough instead of pleasantly crisp. After a brief knead, the dough needs to rest under a towel so the gluten relaxes. This rest makes rolling much easier and helps prevent the dough from shrinking in the oven, keeping your layers even and round.
Rolling and baking thin cake layers evenly
Working with several thin layers can seem intimidating, but the process is straightforward if you are organized. Divide the rested dough into equal pieces so the layers bake uniformly. Roll each piece out on a lightly floured surface, turning it from time to time to avoid sticking. To get perfectly round and neat layers, trim the dough using a large plate or lid as a template. Bake each circle in a well‑preheated oven until lightly golden at the edges; they will firm up more as they cool. Do not walk away, because thin layers can burn quickly. Save all the trimmed edges and scraps – once baked, you can crumble them and use them to decorate the sides of the cake or enjoy them as a cook’s treat.
Tips for whipping a thick, airy sour cream filling
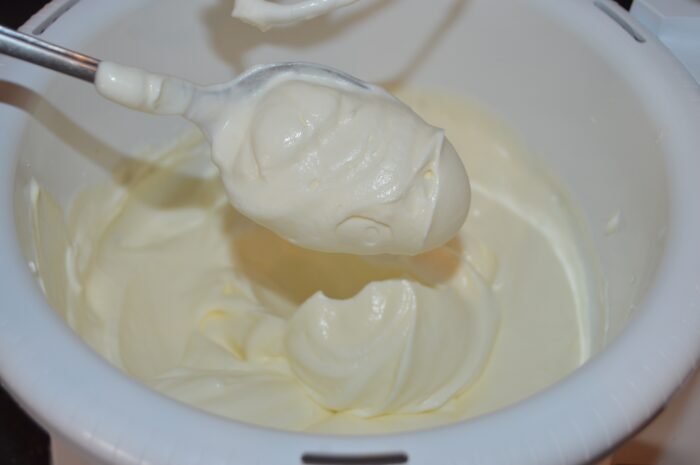
The filling for Smetannik is simple but needs a bit of attention to come out thick and fluffy. Start with well‑chilled, drained sour cream so it already has a dense texture. Beat it with sugar first on low speed so the sugar starts dissolving without splashing, then increase the speed and whip for several minutes until the cream holds soft peaks. Using granulated sugar works, but superfine sugar will dissolve faster and give a smoother finish. Avoid over‑whipping, which can cause the cream to turn grainy. If your kitchen is very warm, you can chill the bowl and beaters beforehand. A properly whipped sour cream filling spreads easily, clings to the layers and sets nicely in the refrigerator without leaking.
Assembling the Smetannik cake so the layers stay moist
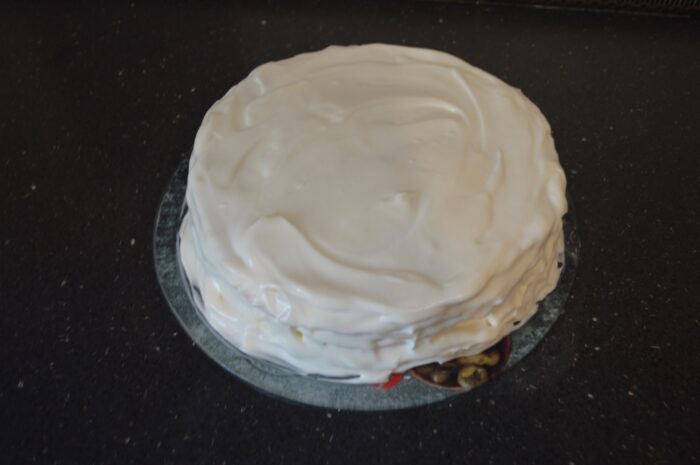
Assembly is where Smetannik transforms from simple components into a show‑stopping cake. Start by spreading a thin layer of cream on the serving plate to keep the first layer in place. Each baked circle is brushed with warm milk to gently soften it before adding a generous layer of sour cream filling. As you stack the layers, try to distribute the cream evenly so the cake settles straight and doesn’t lean to one side. Once all seven layers are in place, use the remaining cream to coat the top and sides. The cake will look quite tall at this stage, but it will settle slightly as it chills. Cover and refrigerate for several hours or overnight to let the moisture move from the cream into the layers.
Making a simple chocolate glaze for a glossy finish
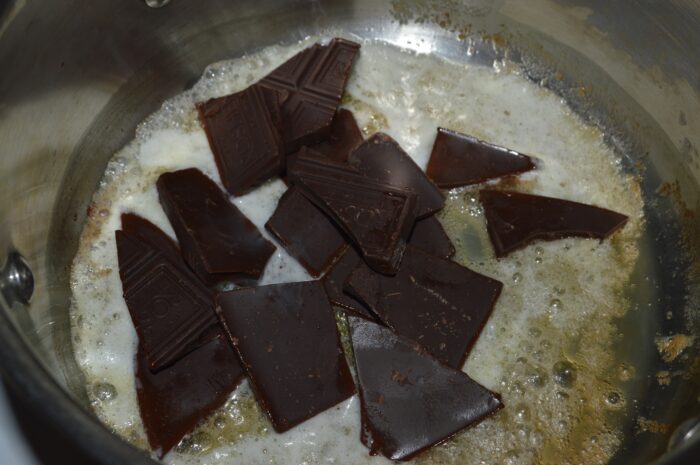
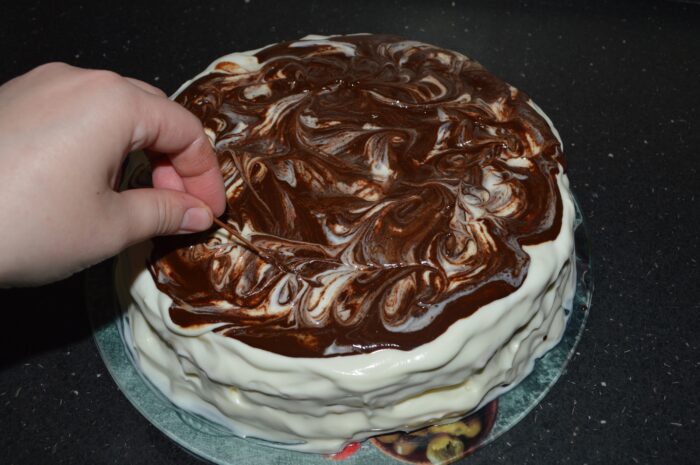
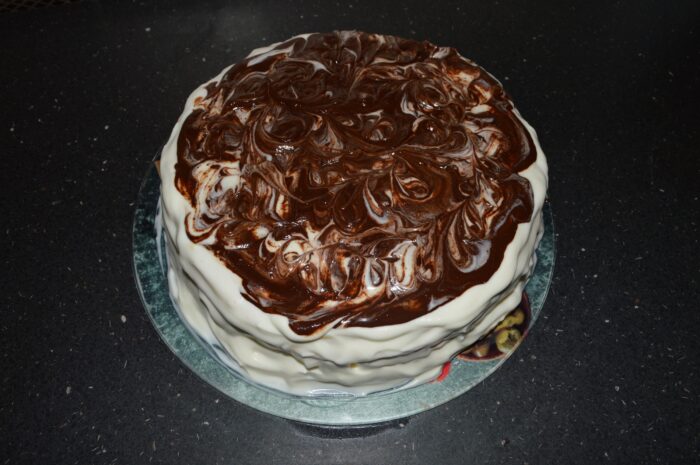
The chocolate glaze used for Smetannik is very minimal, but it adds a beautiful finish and a pleasant bittersweet note. By melting dark chocolate together with butter, you get a smooth, pourable glaze that sets softly on top of the chilled cake. Chop the chocolate into small pieces so it melts quickly and evenly in the warm butter. Stir gently without incorporating too much air and let it cool just slightly so it thickens but is still fluid enough to spread. When you pour it over the cake, start in the center and use a spoon to nudge it towards the edges. A wooden skewer is perfect for drawing small circles or swirls in the glaze, giving the dessert a hand‑decorated, homemade look without much effort.
Serving and storing your sour cream layer cake
Smetannik tastes best when it has had time to rest, so plan ahead and let it chill at least 5–6 hours, preferably overnight. The layers will become tender and slice more cleanly, and the flavors will blend. When you are ready to serve, use a sharp, thin knife and wipe it between cuts for neat slices that show off the layers. This cake is quite rich, so modest portions are usually enough. Store leftovers covered in the refrigerator for up to three days; the texture actually improves over the first 24 hours. Because of the dairy‑based cream, avoid leaving the cake at room temperature for too long. It is an ideal make‑ahead dessert for busy holidays and family gatherings.
Ingredients
For the cake layers:
- ¾ cup sour cream 20% fat
- 2 teaspoons baking powder
- 2 large eggs
- 1 cup granulated sugar
- 3½ tablespoons unsalted butter melted
- 2 tablespoons neutral oil
- 4 cups all‑purpose flour plus extra for dusting
For the sour cream filling:
- 4 cups full‑fat sour cream 25% fat
- 1 cup granulated sugar
For brushing the layers:
- warm milk
For the chocolate glaze:
- 3 tablespoons unsalted butter
- 3.5 oz dark chocolate bar roughly chopped
Instructions
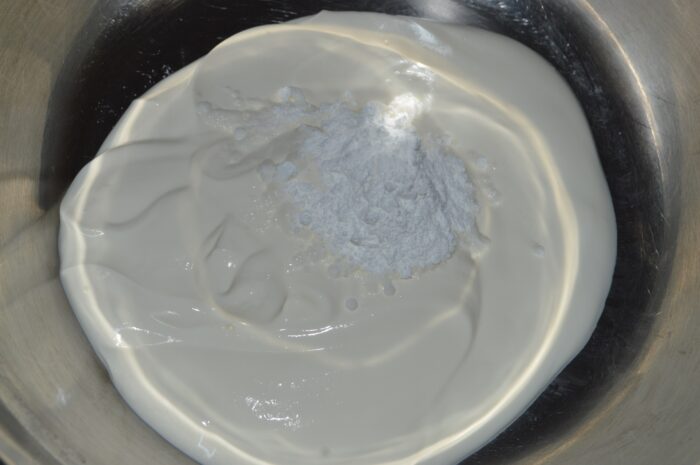
- Put the 3⁄4 cup sour cream and baking powder into a mixing bowl.

- Whisk well until you see air bubbles forming; this means the baking powder is reacting with the sour cream.
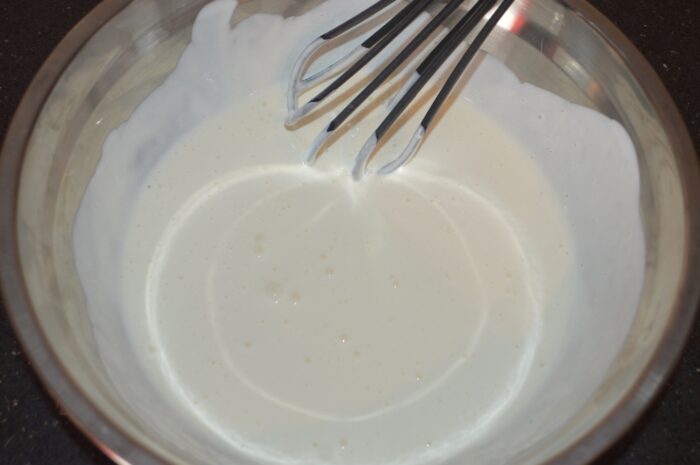
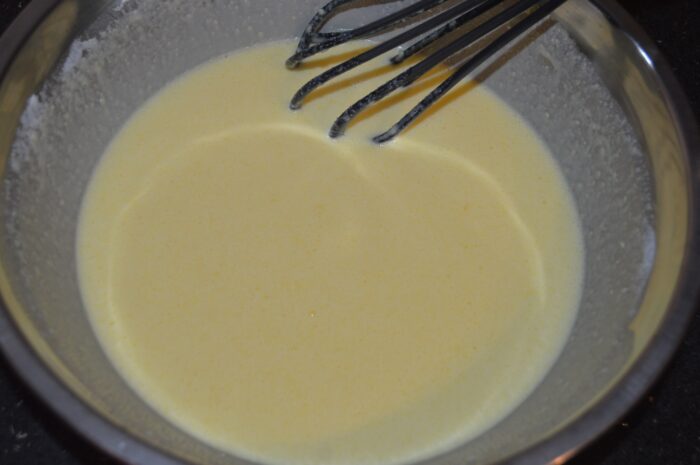
- Add the eggs, sugar, oil, and melted butter to the bowl.
- Mix everything thoroughly until the mixture is smooth and well combined.
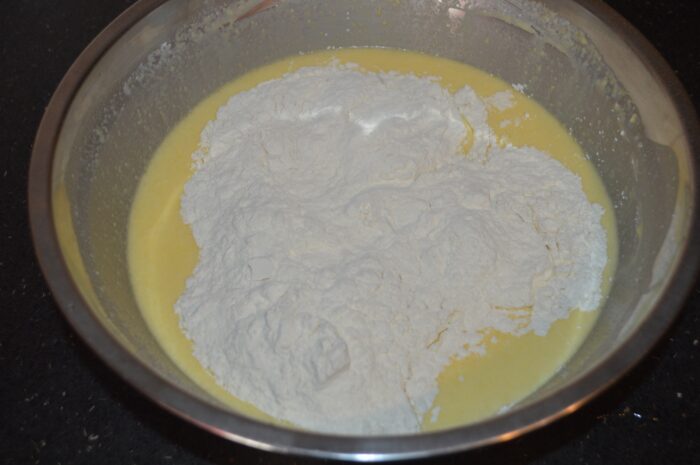
- Add the flour to the wet ingredients.
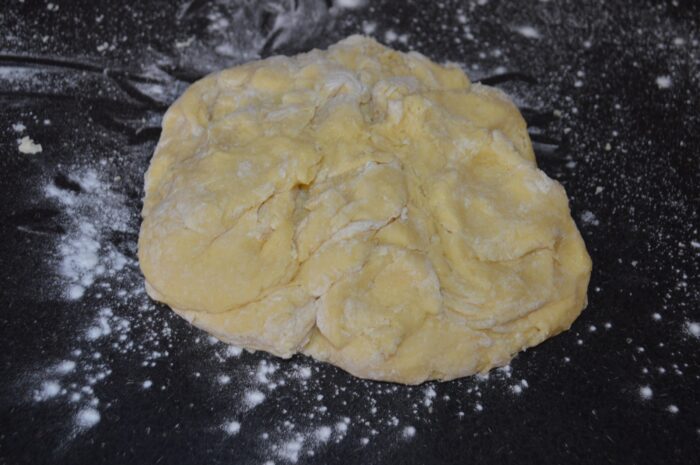
- Start mixing with a spoon, then switch to your hands and knead until a soft dough forms.
- Lightly flour your work surface and place the dough on it.
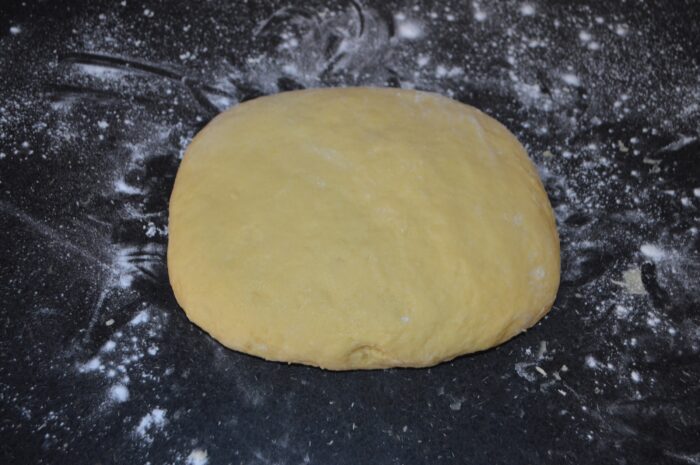
- Knead briefly just until the dough is smooth, then cover it with a kitchen towel and let it rest for 30 minutes.
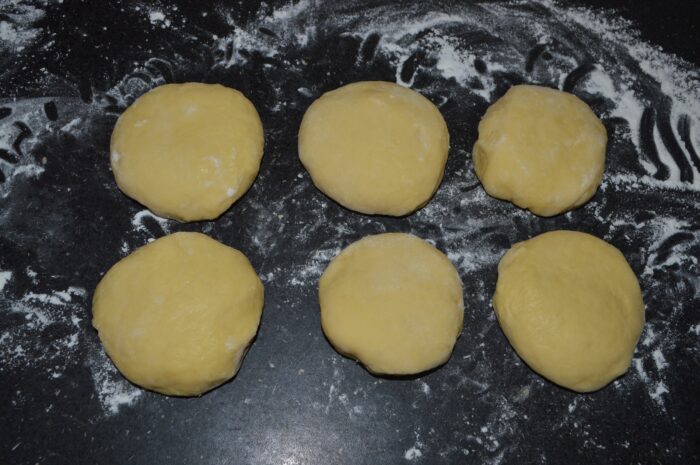
- After resting, divide the dough into 6 equal pieces and shape each one into a ball.
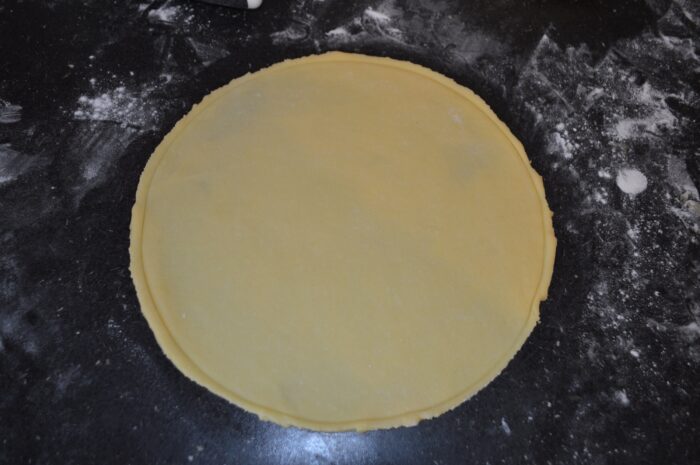
- Roll each ball out with a rolling pin, dusting with a little flour underneath so it doesn’t stick, and use a large round lid or plate to trim into an even circle.
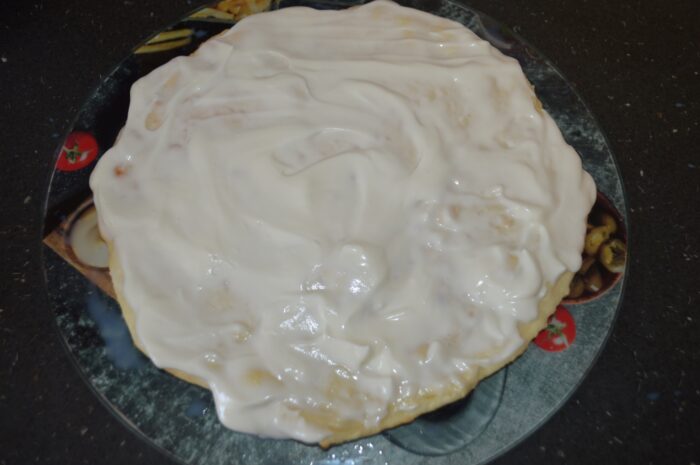
- You should get a circle like this; bake each one in a preheated 400°F (200°C) oven for 7–8 minutes. Do this with every dough ball: you start with 6, but after trimming the edges you will have enough scraps to roll one more circle, for a total of 7 layers.
- Keep an eye on the layers so they don’t burn, as every oven bakes differently.
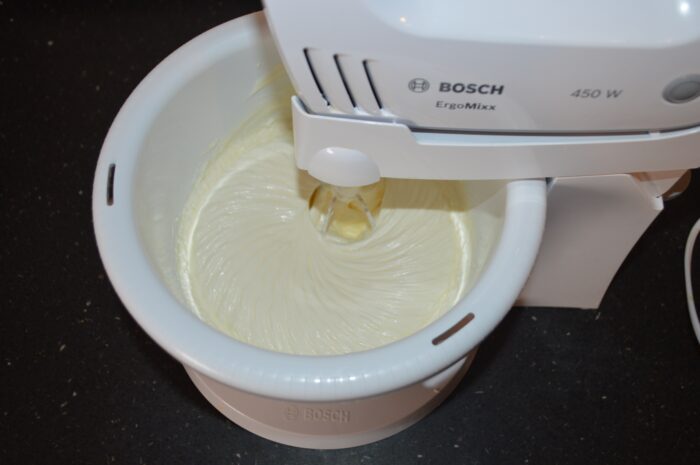
- Meanwhile, prepare the cream: using a mixer, beat the full‑fat sour cream and sugar together, starting on low speed for 1 minute, then on high speed for 8–10 minutes.
- To make the cream thicker, place the sour cream in a cheesecloth‑lined strainer and let it drain for 4–5 hours or, even better, overnight so the whey drips out. This gives you a rich, thick cream for the filling.
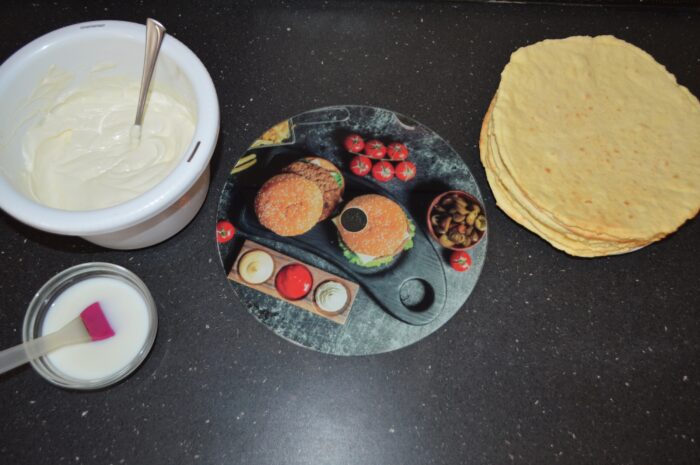
- Set up your work surface for assembling the cake.
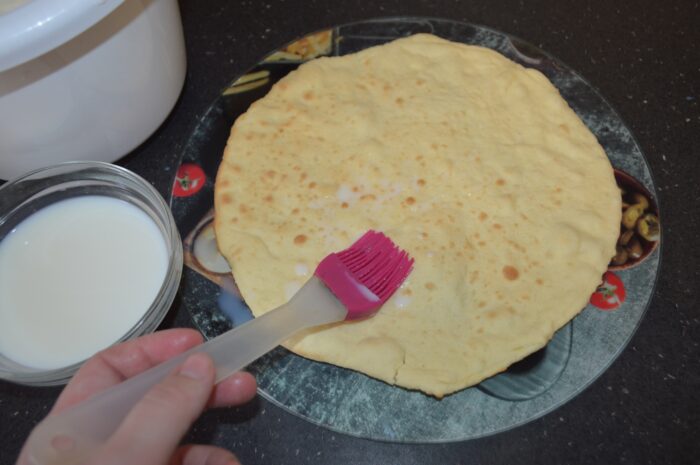
- Spread a little cream on your serving plate, then place the first cake layer on top. Brush each layer with warm milk.
- Spread a generous layer of sour cream filling over the cake layer.
- Repeat this process with all 7 cake layers.
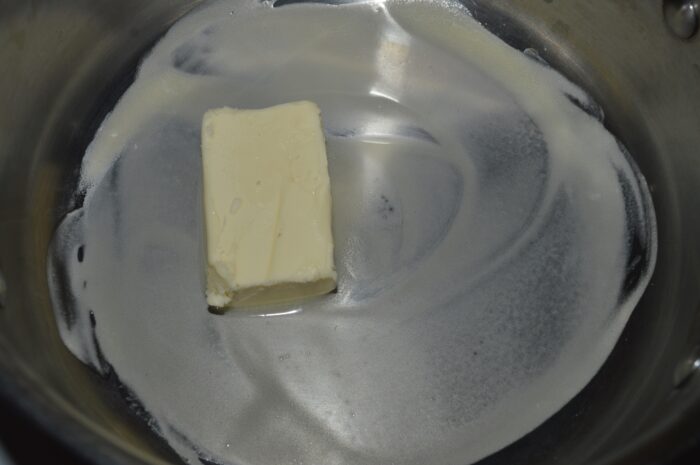
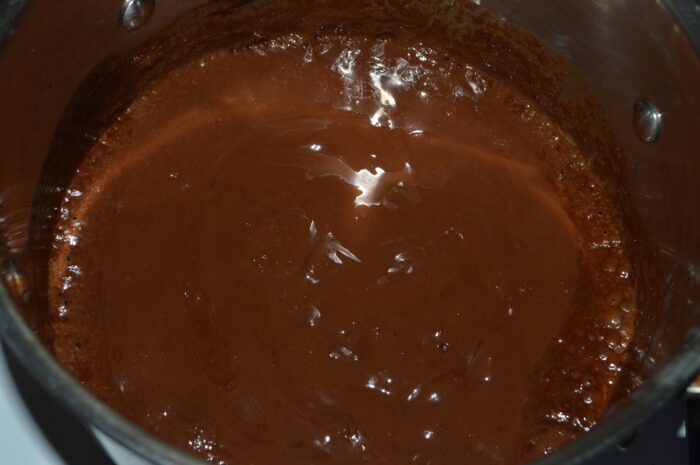
- In a small saucepan, melt the butter.
- Break the dark chocolate into small pieces so it melts faster, and add it to the melted butter.
- Stir until the chocolate glaze is smooth and glossy.
- Pour the glaze over the top of the cake and smooth it out with the back of a spoon. Then, using a wooden skewer, draw small circles or any pattern you like to decorate the top.
- Refrigerate the cake for 5–6 hours, or ideally overnight, so the layers can soften and the flavors meld together.


Notes
- For best results, use high‑fat sour cream and plan time to drain it in advance.
- Keep the dough soft; add just enough flour so it does not stick but still rolls easily.
- Brush each baked layer with warm milk so the cake becomes tender as it chills.
- Allow the assembled cake to rest overnight for the ideal melt‑in‑the‑mouth texture.
- A good quality dark chocolate bar will give the glaze a deep, clean flavor.
- You can decorate the sides with cake crumbs or chopped nuts for a classic bakery look.
Nutrition
Nutrition information is automatically calculated, so should only be used as an approximation.
Frequently Asked Questions
It is not recommended, because low‑fat sour cream is thinner and will not whip into a stable filling. Full‑fat sour cream with at least 20–25% fat gives the best texture and flavor.
If you prefer, you can skip the glaze and simply coat the top and sides with sour cream and sprinkle cake crumbs or chopped nuts. The dessert will still taste delicious and look homely.
Yes, you can bake the layers a day ahead. Let them cool completely, then store them in an airtight container at room temperature. Assemble the cake and add the cream the next day.